
Latest
DIY Guide: Step-by-Step Inspection & Annual Maintenance for Inflatable Lifejackets
An inflatable lifejacket is precision personal life-saving equipment that requires annual inspection to guarantee flawless deployment in an emergency. Unless you operate under statutory commercial regulations requiring accredited station certification, you can readily perform the annual maintenance inspection yourself at home.
Tools Required Before Starting:
- A digital kitchen scale accurate to 1 gram.
- A manual pump or clean inflator (avoid blowing orally if possible, as breath condensation introduces moisture into the bladder).
- Fresh re-arming components or spare parts if items are damaged or expired: Browse our lifejacket spare parts catalog here →
Step 1: Visual Examination of Outer Cover, Webbing & Buckles
Open the zip or Velcro fastenings on the protective outer valise to expose the inflation bladder and firing heads. Take a photo of the bladder before unfolding it.
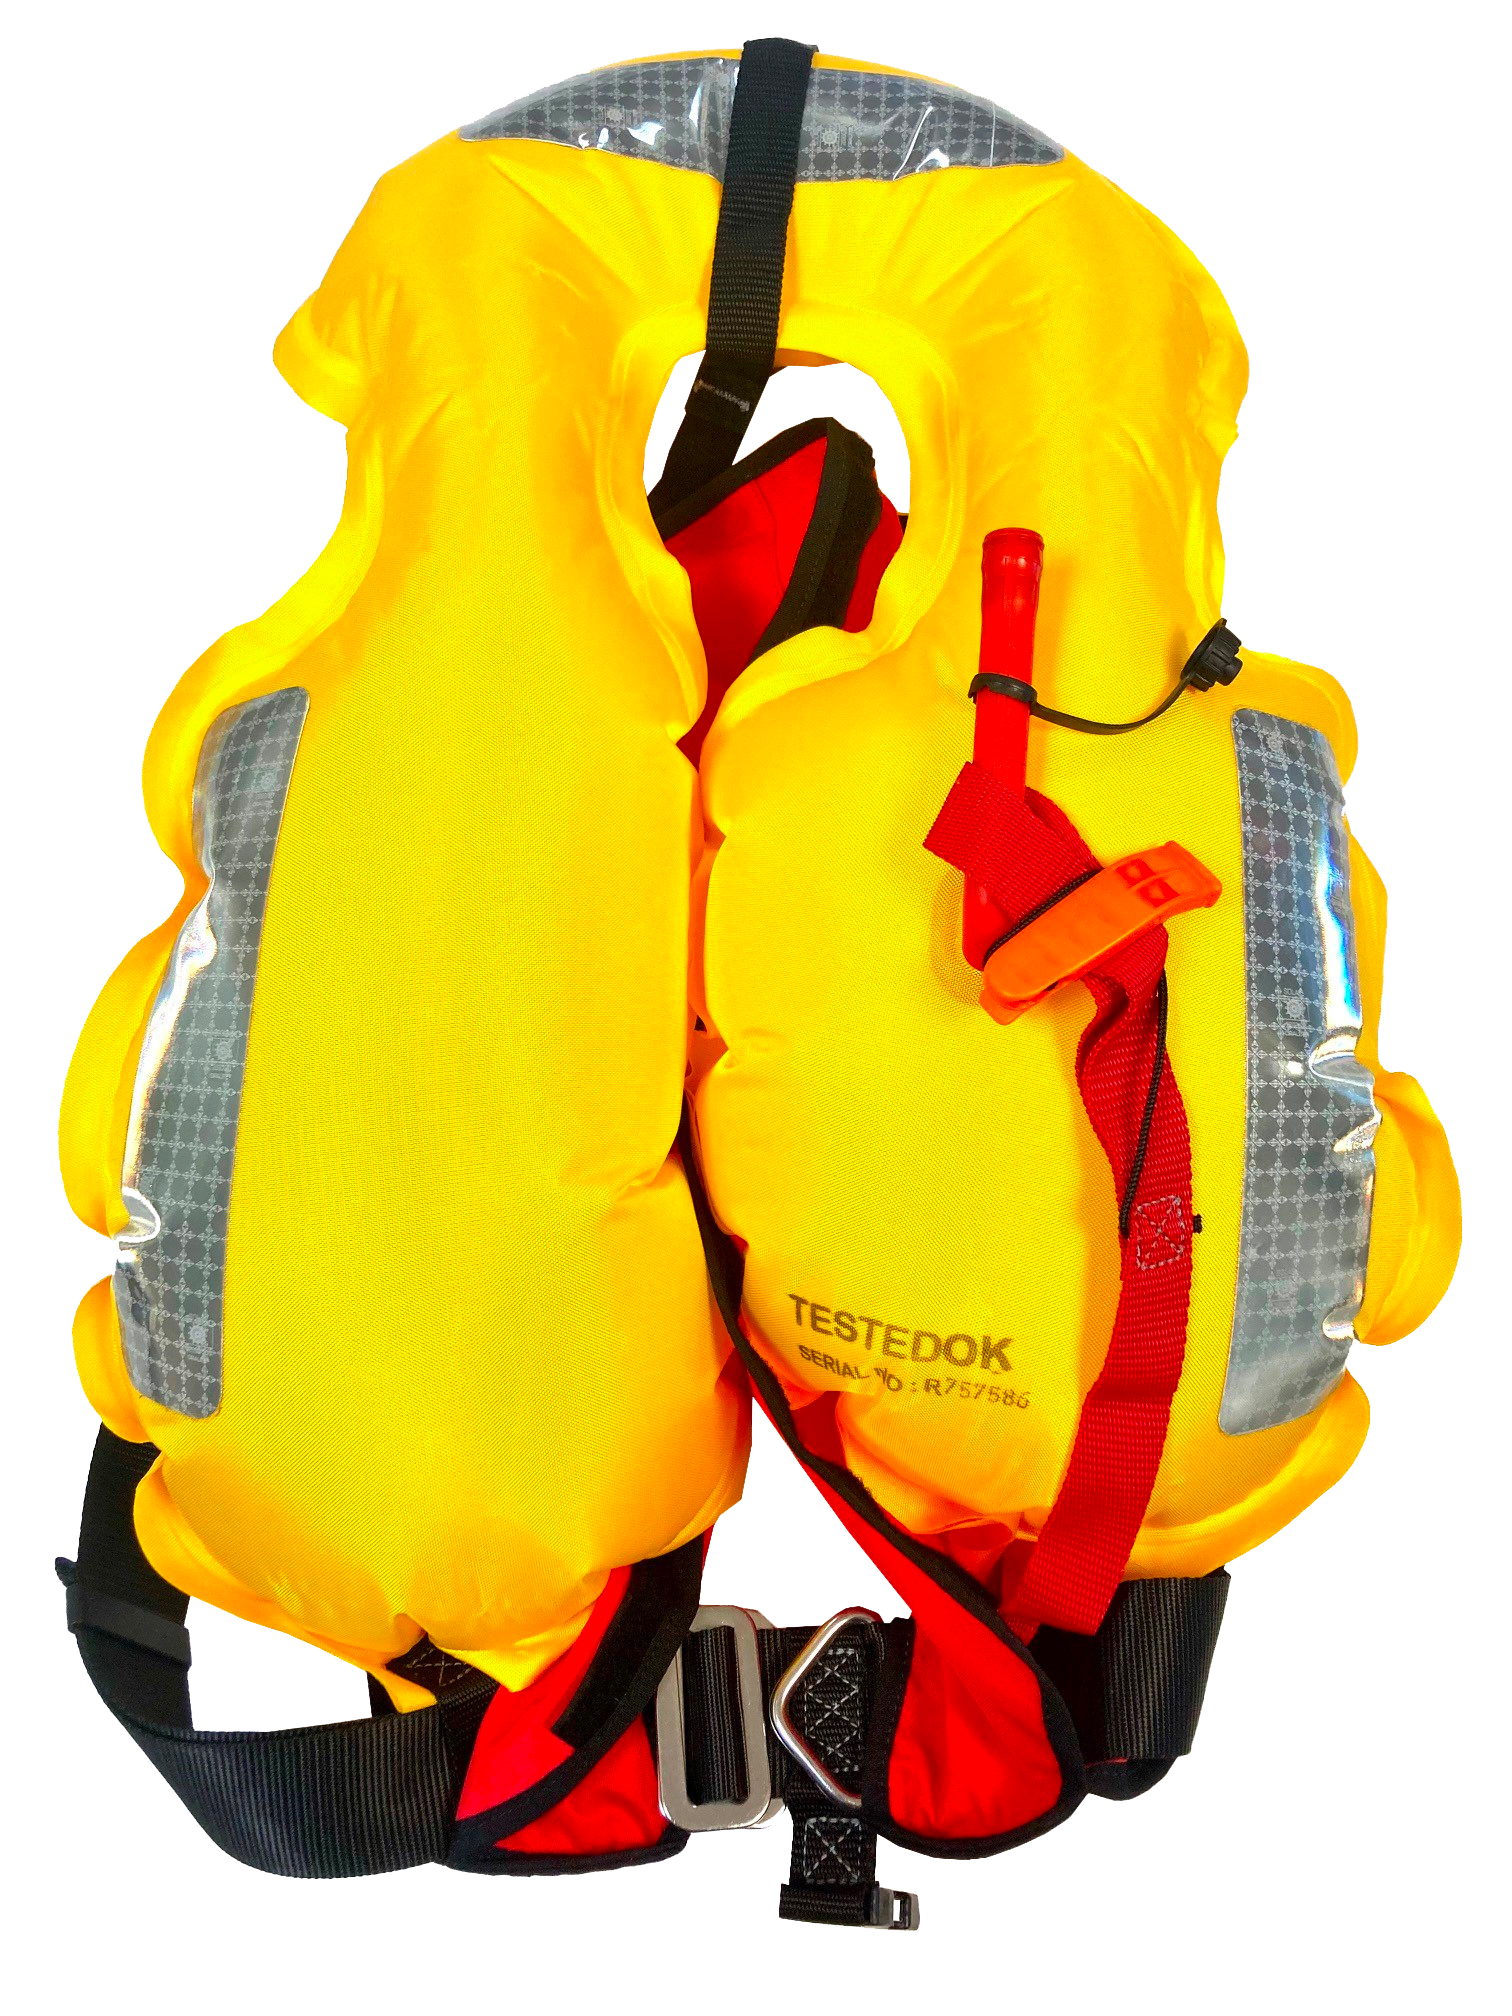
- Harness & Webbing: Inspect neck straps, waistbands, and crotch straps for chafing, fabric fraying, UV degradation, or broken stitching.
- Buckles & Fasteners: Verify that stainless steel or heavy-duty plastic buckles are crack-free, unbent, and latch firmly with an audible click.
- Whistle & Retroreflective Tape: Ensure the safety whistle is firmly attached and SOLAS reflective patches are intact.
Step 2: Bladder Airtightness Pressure Test (24 Hours)
To confirm the high-frequency welded polyurethane bladder is entirely free of pinholes or valve leakage:
- Unfold the inflatable bladder completely.
- Inflate orally or with a dry pump via the oral tube until firm and rigid.
- Leave the inflated lifejacket resting in a stable room temperature environment for 24 hours.
- Check firmness after 24 hours: If the bladder has softened or lost air pressure, it is unseaworthy and must be condemned or professionally repaired. If it remains hard, the bladder is airtight.
Step 3: Weigh the CO₂ Gas Cylinder
A gas cylinder may appear intact but can slowly bleed pressure through damaged seal caps over time.
- Unscrew the CO₂ cylinder counterclockwise from the operating head.
- Examine the piercing cap: Confirm the flat metal seal is unpierced and the steel body is free from rust or pitting.
- Weigh the cylinder on your scale: Locate the stamped Gross Weight (GR.WT.) on the steel casing (e.g., 138g for standard 33g cylinders). The scale reading must match within ±2 grams. Replace immediately if underweight.


→ Need replacement gas? Purchase original CO₂ cylinders (33g, 38g, 60g) here.
Step 4: Inspect Firing Head & Water-Activated Bobbin Expiration
Water-activated inflators utilize dissolving paper or micro-elements that degrade with atmospheric moisture:
- United Moulders (UML): Verify the printed expiration date on the cartridge body (e.g., EXP 05/2027). Replace immediately if expired or showing red indicators.

- Halkey-Roberts (HR): Remove the base cap and extract the internal yellow bobbin (V80040). Check the date code and ensure the white chemical compound is smooth and uncracked.


- Green Safety Indicator Clip: Confirm that the manual firing lever green clip is snapped firmly into position to prevent accidental manual firing.
→ Replace expiring cartridges: Order factory-fresh UML and Halkey-Roberts re-arm kits here.
Step 5: Inspect and Retrofit Crucial Safety Accessories
An inflatable lifejacket is a comprehensive personal survival platform. Verify that your lifejacket is equipped with the following vital safety components, and replace or retrofit any missing or worn equipment:
- Audible Whistle: An approved marine-grade safety whistle must be firmly lashed to its retaining loop to signal for assistance in emergency conditions.
- Retroreflective Tape: Ensure SOLAS-approved retroreflective patches on the inflation bladder are clean, unabraded, and securely bonded. Damaged patches are easily replaced using self-adhesive marine-grade tape.
- Crotch / Crutch Strap: A fitted crotch strap is an indispensable safety feature. Without an engaged crutch strap, an inflated vest risks riding up over the wearer's head upon water entry, drastically reducing effective mouth freeboard.
- Harness Buckle: Confirm the waist closure buckle is crack-free, latches firmly, and grips the load-bearing webbing securely under tension.
- Emergency Locator Light: An automatic, water-activated Daniamant W4 lifejacket light significantly accelerates night-time detection during a man-overboard event. Utilizing a tube mounting clip, this SOLAS-certified strobe retrofits in seconds to virtually any inflatable lifejacket on the market—highly recommended for evening navigation.
Step 6: Deflation, Reassembly & Repacking
- Expel air: Invert the oral tube dust cap and gently depress the internal one-way valve with the cap back while rolling out the air. Never insert sharp metallic objects into the valve.
- Reassemble: Install the fresh bobbin first, lock the green indicator clip, and screw in the verified CO₂ cylinder clockwise by hand until snug. Do not over-tighten with tools.
- Folding: Follow the manufacturer's original fold creases. Never roll the bladder inside the cover, as rolling can impede automatic burst-open deployment.
- Position Pull Lanyard: Ensure the manual pull toggle hangs free and accessible outside the outer valise.
- Securely close the outer valise zip or Velcro closures.
Step 7: Proper Care, Storage and Handling – Maximizing Equipment Lifespan
Routine care between voyages is the single most critical factor in guaranteeing operational reliability and long equipment service life:
- Rinsing and Drying: If damp, always hang the lifejacket on a coat hanger to drip-dry at room temperature. If exposed to salt spray, wipe down the outer valise with fresh lukewarm water. Important: Never direct running water onto the inflator mechanism, as this will dissolve the water-sensitive bobbin.
- Proper Storage: Store the lifejacket hanging or laid flat in a dry, well-ventilated space away from direct sunlight. Avoid damp lockers and harsh UV exposure, which degrades webbing fibers and exterior coatings.
- Avoid Cushioning: Never use an inflatable lifejacket as a boat cushion or backrest. Compressive point loads can puncture internal bladders, damage delicate operating heads, or distort CO₂ cylinder mountings.
- Above all – wear it: A lifejacket offers zero protection if stowed away inside a cabin berth. Marine emergencies occur without warning—make it a mandatory habit to don and buckle your lifejacket before stepping aboard!
Record the Service Date!
Mark the internal service log grid using permanent waterproof ink with the month and year of completion. Make this maintenance inspection an annual routine prior to each boating season. Have questions regarding inflator systems or commercial vessel fleet compliance? Contact our technical marine specialists at Bövik Marin AB.