
Gasket Removal and Re-Installation Procedure
Items Needed to Complete This Job
- Plastic razor blade or dull putty knife / scraper
- Spatula or narrow blade for sealant spreading
- X-ACTO knife or sharp utility razor
- Stainless steel / brass wire brush or rotary abrasive pad (bare metal only)
- Low-tack adhesive tape (masking tape)
- Rubber / nitrile gloves
- Chalkboard chalk & paper test strips (~50 mm / 2" wide)
- Model-Specific Freeman Neoprene Gasket
- Sikaflex 591 STP Marine Adhesive / Sealant (ex: Sikaflex-291)
- Crosseven Marine Contact Adhesive (75 ml)
- General purpose high performance instant adhesive (ex: Loctite 495)
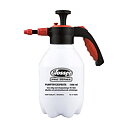
- Star brite Ultimate Aluminum Cleaner (ex: ZEP-A-LUME)
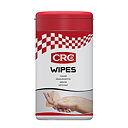
- CRC Heavy-Duty Wipes & Denatured Alcohol (Isopropanol)
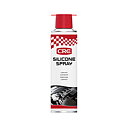
- CRC Silicone Stick for Gaskets (50 ml)
Phase 1: Gasket Removal & Groove Preparation
Remove existing gasket
Peel worn gasket out of the cover channel. If adhesion is tenacious, carefully lift a leading edge with a dull plastic scraper.
Clean the gasket groove free of corrosion, debris, and residues
The groove must be completely bare, clean, and dry. Treatment varies by substrate:
Phase 2: Gasket Installation & Bedding
Position closure
Position the closure so that the groove into which the gasket will be placed is facing upward throughout installation.
Apply adhesive / bedding sealant
Apply a bead of marine adhesive/sealant in the center of the gasket groove, filling and spreading to a consistent film of 8–10 mil thickness (~0.20–0.25 mm) across the channel floor.
Clean new gasket material
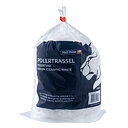
Clean the replacement gasket with a clean shop towel and non-petroleum based solvent to remove mold-release residues.
Cut to length & Instant Adhesive Butt-Joint
If necessary, cut gasket to proper length; do not stretch the gasket to fit. Clean both butt ends and allow to dry. Apply a thin coat of general purpose high performance instant adhesive (Loctite 495) to the surface of one end; align ends and press firmly, holding in place until fully bonded.
Channel seating, taping & closed-dog fitment
Place gasket into groove so that shape is not distorted or stretched, applying firm, consistent pressure. Use low-tack adhesive tape to hold in position, taping entire radius securely under slight pressure.
Cure adhesive/sealant
Cure adhesive/sealant according to manufacturer instructions. Apply CRC Silicone Stick conditioning to prevent surface bonding.
Phase 3: Dog Tension Adjustment & Topside Paper Test (1-Turn Method)
Adjustment is critical as it ensures proper gasket compression after re-installation. The Freeman Marine hatch is engineered to open and close with uniform tension. Best completed with cover plate in place in the ring and mechanism in closed position.
Topside Dog Adjustment (Paper Test Procedure):
- Loosen all dogs to the point of zero resistance on the handle.
- Place a strip of paper on the deck ring near where one dog will engage when closed.
- Tighten the dog adjustment nut one turn on that dog.
- Close the hatch and turn the handle to dog the hatch.
- If you can pull the paper out with little resistance, the dog needs tightening.
- Open the hatch and repeat steps 3 and 4: Only proceed one turn on the nut per cycle.
- Continue until the paper resists being pulled out. This dog is now correctly adjusted without being over-tight.
- Repeat steps 1–7 on each individual dog around the hatch perimeter.
- Final Verification: You should now be able to place the paper anywhere on the deck ring without being able to pull it out, while dogging the hatch without excessive handle effort.
Chalk Test (Marine Classification Verification):
Rub a solid chalk line along the top of the coaming knife-edge. Close and fully dog the hatch. Open vertically. An unbroken white chalk transfer line along the entire gasket perimeter verifies 100% watertight integrity under class rules.
Download Service Procedure as PDF
Official shipboard document (DOC #2400-G01) featuring English procedure on side 1 and Swedish on reverse. Engineered for shipboard workshops, deck crews, or Planned Maintenance Systems (PMS).