
Cast Hatch Center Bushing Replacement Procedure
Identifying Replacement Bushing Kits via "S" Stamp
The hatch cover may feature a stainless steel sleeve cast directly in place or seated during fabrication. Closely inspect the underside of the hatch cover around the center hub area prior to ordering and installation:
The stainless steel sleeve is cast in place into the aluminum hatch. Always use replacement bushing kit:
BFR-0031-2204
The stainless steel sleeve has been seated into the casting. Always use replacement bushing kit:
BFR-0031-2203
Items Needed to Complete This Job
- 1/4” pin punch (6.35 mm)
- 15/16” driver (outside diameter .9375" / ~23.8 mm round stock or socket)
- 1-1/2” driver with flat face (OD ~38 mm, larger than bushing top O.D.)
- Hammer
- Sturdy work surface supporting the cover and center shaft
- Freeman Replacement Bushing Kit (BFR-0031-2204 or BFR-0031-2203)
- Sikaflex 591 STP Marine Adhesive / Sealant (ex: Sikaflex 1-A)
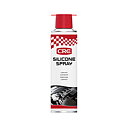
- CRC Ceramic Paste Anti-Seize (ex: Tef-Gel lubricant)
- Vickers Oils BIOGREASE EP2 (for O-ring and spindle shaft packing)
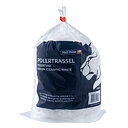
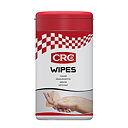
- Star brite Aluminum Cleaner & Acetone / Heavy-Duty Wipes
Step-by-Step Procedure
Support shaft and drive out the knurled pin
Fully support the center shaft of the hatch on a sturdy work surface. Using a 1/4” pin punch, drive the pin out of the actuator or escape handle on the bottom of the shaft.
Critical: The knurled end should be the first end out!
Remove actuator and handle assembly
Slide the actuator or escape handle off the bottom of the shaft. Slide the exterior handle and spindle upward and out of the cover plate assembly.
Drive out the old center bushing
Use a 15/16” (.9375" OD) round stock, steel rod, or socket from the top to drive the old bushing downward and out of the center hub casting.
Clean recess down to bare metal
Clean the recess in the cover thoroughly. It is necessary to remove all foreign material from the center hub area, down to bare metal. If this area is not properly cleaned, you will not obtain proper adhesion and sealing of the new bushing.
Once the center hub area is bare metal, wash down thoroughly with acetone, Star brite Aluminum Cleaner, or heavy-duty marine wipes and allow to dry.
Apply marine adhesive / bedding sealant
Seal the bushing into the recess using Sikaflex 591 STP marine sealant. Be certain to coat the center hub area where the bushing flange interfaces with the cover casting to create an impervious waterproof barrier.
Tap the new bushing into place
Using a driver with a flat surface that is approximately 1-1/2” diameter (larger than the top of the bushing O.D.), gently TAP the new bushing into place. Once it bottoms out, do not attempt to drive it further.
Lubricate O-Ring and reinstall handle
Lubricate the pre-installed O-ring inside the bushing with Vickers Oils BIOGREASE EP2 marine grease. Slide the handle back into place from the top. It should slide in with relative ease when properly lubricated.
Reinstall actuator & drive knurled pin
Coat the knurled pin with CRC Ceramic Paste or Tef-Gel. Slide the actuator or escape handle onto the shaft with handle arms pointed down. Align the hole in the shaft with the hole in the handle.
Download Service Procedure as PDF
Official shipboard document (DOC #2400-M02) with English on side 1 and Swedish on reverse. Tailored for shipboard Planned Maintenance Systems (PMS) and overhaul yards.