
Dog Arm Replacement & Adjustment Procedure
Items Needed to Complete This Job
- 9/16” wrench or socket (sized for 3/8”-16 hardware)
- High-visibility chalk (blue chalkboard chalk recommended)
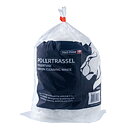
- Clean shop towel / lint-free wipe
- Model-Specific Freeman Aluminum Dog Arms
- New 3/8”-16 Nylock nuts (strongly recommended when removing)
- New nylon washers & stainless steel washers
- Vickers Oils BIOGREASE EP2 (for cam hub and stud lubrication)
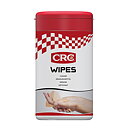
- CRC Heavy-Duty Marine Cleaning Wipes (50 pcs)
Procedure: Disassembly & Installation
Remove the Nylock nut
Using a 9/16” wrench or socket, remove the 3/8”-16 nylock nut securing the dog arm to the cover stud.
Remove washers
Remove the stainless steel washer and nylon washer. Inspect the nylon washer; replace if deformed or cracked.
Lift dog arm clear of stud
Lift the dog arm away from the cover until the arm slot completely clears the 3/8”-16 mounting stud.
Rotate 90° and pull from hub
Rotate the dog arm 90° in either direction and pull the dog arm away from the central cam hub. Clean mating components and apply a thin film of Vickers BIOGREASE EP2 to the cam button prior to reassembly.
Installation
Installation is the reverse order of removal: Insert the dog arm into the hub rotated 90°, rotate back, slide over the stud, install the nylon washer (against arm), stainless steel washer, and secure with a new nylock nut.
- For 24x24 dogs: Notice there is a dip in the spine of the dog that must face the cover of the hatch.
- For dogs with scuff plates: The scuff plate must face the cover when installed.
Phase 2: Tension Adjustment & Chalk Test
To adjust the dog arms for proper seal, perform a standardized chalk test following Freeman Marine procedures:
- Start by cleaning the coaming knife-edge and gasket surface free of debris and salt crystals.
- Take a high-visibility colored chalk (blue for example) and rub along the sealing knife-edge, ensuring the edge is generously and uniformly coated.
- Close and dog the hatch fully down.
- Open the hatch and inspect the gasket:
- Satisfactory result: The gasket should display a continuous, unbroken chalk imprint around the entire perimeter. This confirms uniform compression contact between coaming and seal.
- Unsatisfactory result: A break or faint patch in the chalk imprint indicates an ineffective seal and localized leak path.
- Adjust the dog arms by tightening or loosening the 3/8”-16 nylock nut.
- Wipe away chalk, re-coat the edge, and retest after adjusting.
- Final Result: All dog arms should have even pressure. The operating handle should cycle smoothly while all dogs remain rigid in the fully locked position.
Download Service Procedure as PDF
Official shipboard document (DOC BM-2400-M01) featuring Swedish and English instructions. Tailored for shipboard Planned Maintenance Systems (PMS) and deck refit crews.